Showing posts with label Clan Bosses. Show all posts

Thursday, May 18, 2023

Hydra Chests Data & Analysis

Hi Everyone! Here I share with you data and analysis on Hydra Chests:

Thursday, May 4, 2023

90M Hydra Brutal Guide by COSMOS - 1 picture guide / collage + Explanations

Hey RAID players, in this blog post I share with you a 1 picture guide showing my team achieving 90M damage on Hydra Brutal including a lot of information about it.

If you want to skip the text just scroll down to the picture below - it is a large picture, feel free to zoom in and move around to see all aspects shown on the picture. Otherwise, continue reading below for various text explanations.

Wednesday, May 3, 2023

Friday, February 24, 2023

91.3M damage Hydra Brutal with 2 Geomancers

Hi, sharing here my new record and yet another Hydra team composition reaching 91.3M damage on Brutal which was also above 1000 turns.

Wednesday, February 22, 2023

Reference: Clan Boss drops per Month by ChoseN

Sharing here the work by ChoseN showing the Clan Boss drops per month based on his data:


Saturday, February 18, 2023

Motivation = FAST runs: 9:42 min 1 Key NM (71M) with UNTUNED Team, No shields, No counter-attack, No unkillable, No block damage, FULL ATTACK

Hi everyone, I am sharing with you my team which I use for RAID Clan Boss NM and below to finish very fast ~10 min or less while getting high damage.

The motivation for this is because I don't want to spend a long time on Clan Boss so I have been testing different teams to complete it ideally in less than 10 minutes. And I want to hopefully achieve that for UNM also at some point. (my Demytha team currently runs at a crazy ~22 min).

Tuesday, February 7, 2023

Manual Hydra Brutal 87.11M damage - 4 Epics, 1 Free, 1 Guaranteed champion

Here sharing with you a manual Hydra Brutal team composition with which I did 87.11M damage - check it out and I hope it helps you with your success.

Sunday, January 29, 2023

100% Auto Hydra Brutal 47M damage in 16.5 minutes (due to RNG can re-run - range is Fail up to 80M damage) + other 100% Auto Teams

Hi Everyone, here I share with you full details of the team, stats, masteries of my last 100% Auto run on Hydra Brutal with 47M damage in only 16.5 minutes. This Team can do up to 80M damage but can also fail due to the RNG of Hydra, so I just re-run until I get a good enough score.

So here we go, let's start with the Victory picture:

Friday, September 16, 2022

Hydra Brutal 73.5M Damage with a Rare (Pain Keeper)

Here sharing with you my new record & guide on doing 73.5 million damage to Hydra Brutal with a team including a rare Pain Keeper. This is an improvement over the previous Team which I posted 26th of Aug: Hydra Brutal 35M Damage with 5 star rare (1 picture guide) which you can refer to for various explanations, stats and compare with the latest result.

Friday, August 26, 2022

Hydra Brutal 35M Damage with 5 star rare (1 picture guide)

Here sharing with you my new record & guide on doing 35 million damage to Hydra Brutal with a team including a 5 star rare, mediocre stats and much to improve.

UPDATE: after reading all the tips here also check out the latest result: Hydra Brutal 73.5M Damage with a Rare (Pain Keeper)

You can directly check the large image here with all the guide / details, but to add some more tips / explanations:

  • Really very impressive result with 5 star rare. I did not expect to succeed so well when I was planning this team.
  • And there is so much more to improve, so this team can actually do around 50 mil damage or more.
  • Key points of the team are:
  • 2 provoke sets: on Nekmo and Geo. This gives a very high chance to keep the Head of Decay always provoked. Despite that it managed to cleanse 2-3 times during the run. He got really lucky.
  • Husk was actually eaten early and due to multiple bad lucks I did not manage to free him, so maybe I could have done even more damage.
  • Reflex set on Husk was planned to help him to more Max HP attacks. As alternative Relentless set can be used - I just did not have good enough items.
  • Would have been great to have some more ACC on Husk to act as a backup Provoke champion, but I don't have good enough equipment for that at present.
  • While 2 champions have 250 speed, all others are much too slow. This is what would bring the biggest damage boost - if everyone could be 250+ or ideally 270+.
  • Obviously the 5 star rare Pain Keeper can be hugely improved. Both by making him 6 star and by giving him masteries and better equipment.
  • Rector Drath was equipped recently so I am OK with her gear but I still have her old masteries where she was a high RES champion. I need to switch these to Warmaster and this should give at least another million damage.

Hope my RAID blog post was useful to you - best of luck with breaking your Hydra records.

Friday, August 19, 2022

Hydra Hard 69 million Damage with good (not great) stats - 11 pictures, stats, masteries, tips (2000 words)

Here I share with you my new record achieving 69 million damage on Hydra Hard and provide you with all the pictures, stats, masteries and tips to hopefully help you as well.

Let's start with the victory screens summarizing the team and the damage output:

Hydra Hard 69 million damage - Victory Screen 1 of 2 + Time issues

The battle took a very long time, over 1 hour. RAID has a visual bug where it shows 09:34 instead of 69:34. It's an old bug they never bothered to fix.

Before this battle I had several other failed attempts trying out different champions, so it actually took me over 3 hours to use this 1 key. Such problems in RAID are widespread and Plarium refuses to address these issues. Because of this many players just waste their keys on auto-battles with low damage results. And I am definitely not planning to spend the same time in the future; this was a one-off run for a possible record.

Victory Screen 2 of 2 + Equipment Tips

This is from the Clan view which also shows the equipped sets:

Here you can already see that the only "interesting" set is the Provoke set on my Nekmo Thaar. I think it's a great option for him due to his AOE attacks. I did the same for my Geomancer who is in another team. 

For all others I don't care about sets - just trying to get the best stats I can manage. There is a Regeneration set on Godseeker Aniri but this is only because she is helping run my Bommal team. The Immortal sets on Raglin is only because I searched to get high HP on him to survive Arena attacks.

I would like to ideally have 2 champions in Provoke set in the future, because 1 champion does not manage to control the Head of Decay always. But that would mean changing the team which I cannot at present.

Hydra Hard 69 million damage - Last Turns - Picture 1 of 2

Near the end, before the team is eaten, I decided to take this screenshot. This is another proof of the "over 1 hour" time and at this moment shows 64.7 mil damage and 226 turns.

I also already know I cannot keep up with RAID's cheating (the Heads start eating every turn) and the battle will end very soon.

Last Turns - Picture 2 of 2

This is the last picture before death. Turn count = 250 turns!

You can see that 3 champions are being digested at the same time and the last 2 will be grabbed immediately. This has nothing to do with skill or strategy - it is designed to make you lose at this point by consuming champions every turn. This is not a criticism, just a statement of fact.

Hydra Hard 69 million damage - Team Stats

Below are the summary showing all the champion stats and gear from RSL view. As noted the stats are good but definitely not great. Top players have significantly better stats than this.

Tips / stat targets:

  • Nekmo - I only need him to go as fast as he can and apply the debuffs. While I don't care about his damage output I did give him Warmaster since all his attacks are AOE, so that adds up but his own damage is irrelevant for me.
  • Ninja - Main damage dealer 1 of 2 - mine is in a very old Clan Boss build where I needed him to have 256 speed. I never bothered to change his build, so he is very squishy but fast. His main job is to do HP Burn / damage.
  • Raglin & Godskeer - They act as the revivers for the team, usually picking up the dead damage dealers. I usually prefer multi-reviver like Arbiter but mine is in another team so I ended up using these single-revivers for this team. They just have to be fast and tanky to do their job. Raglin's high RES is not for Hydra but was made for Arena. 
  • Uugo - helped my team a lot. Block Buffs, DEF down and the Leech, although chance based, did help a lot with the healing. Here again fast and tanky is the aim.
  • Sicia - Main damage dealer 2 of 2 - unfortunately she failed putting the HP Burn on all enemies very often, but despite that her explosion was very helpful in freeing champions, especially when Ninja was eaten.

Champion details:

Below you can see all the equipment details and champion masteries. You can see that a lot of the equipment can be improved significantly. This is why I said good stats but not great.

Uugo detailed equipment and masteries

Godseeker Aniri detailed equipment and masteries

Sicia Flametongue detailed equipment and masteries

Nekmo Thaar detailed equipment and masteries

Ninja detailed equipment and masteries

Raglin detailed equipment and masteries

Tips & Other:

(in no particular order)

  • For reference: the starting Hydra Heads for this rotation were Decay, Mischief, Blight and Wrath.
  • For Nekmo I think it is important to first cast the Slow and only then go for the Speed which will allow rotation into Slow much faster. Doing Speed then Slow applies the buffs immediately but results in a longer cooldown to re-apply Slow. Given the different affinities and him failing to apply the debuff to all the Heads I think it's better to cycle Slow faster.
About replacements:
  • I think all champions on this team are replaceable with Nekmo being the least due to all the benefits he brings, but still:
  • Nekmo could be replaced by Kimi for example.
  • Revivers by other revivers.
  • Uugo by another Block Buffs champion.
  • And damage dealers by any other equally strong Hydra-specific damage dealers, which could be HP Burn based like these or Max HP based like Royal Guard (which also brings slow) or Husk (which also brings Provoke).
  • That said one must always consider the entire team when making replacements because you might have the case that you don't have a replacement for 1 champion but if you change 3 then you do because your other 3 might together bring the same benefits which 1 alone cannot bring.

Tips continued:

  • If you can get your champion to die instead of being eaten that's much better. You can on purpose not heal and even provoke the super-attack of the Wrath just to kill one of your champions. This is because freeing champions is very dangerous the further you get especially if they are eaten by Mischief or the Fat Head (Suffering).
  • If you had Hex from Mithrala then Mischief becomes a lot less of an issue. My Mithrala is in another team so this team always failed attacking Mischief and I could get him only via the HP Burn hits and explosions.
  • While the Fat Head has both too much HP and, if you are unlucky, he can go 2 times in a row.
  • Otherwise, if you cannot get the champion killed off then prepare your big attacks to be used immediately upon digestion. This means not using your main skills for possible several turns.
  • Managing Blight with Decay is extremely important. If you fail the Provoke and Blight gets off the poison cloud and, at the same time, one of your champions is eaten before you managed to at least get HP Burns then it's game over.
  • So watch carefully the cooldown of Blight's poison cloud. Slow/Provoke Decay. Target them and take one of them down if possible. Blight is actually relatively easy to kill. Decay is tougher.
  • When you get the ATK down and Block Buffs on Wrath he basically becomes not important. Still, use the opportunity to attack him when he is outside his counters. And only if there are no other higher priorities.
  • Try to kill 1 Head at a time to allow you to "farm" damage on Decapitated Heads. Have a sort of a staircase approach and a plan which ones you are taking down and in which order.
  • Do pile into a Decapitated Heads but only if it will produce good damage. Attacking opposite affinity is not a good idea even if it is a Decapitated Head. Attacking Decapitated Heads of certain Hydra Heads (tough ones) is not a good idea because you will do less damage. Fat Head (Suffering) being the worst. 
  • If you are unsure, hit it a couple of times and see. You want to aim for minimum 100k damage per attack, but damage dealers should bring 200k or more per attack.
  • If you are waiting for the cooldown of Decrease Defense then I believe it is better to attack an Active Hydra Head with DEF down instead of attacking a Decapitated Head without DEF down.
  • DEF down and Weaken are very significant for boosting damage output.
  • If Mischief is up (in a team like this without Hex) then most attacks should go for Mischief when the Wrath Head is in crazy-mode. This is because this is the only time you can safely attack Mischief and not increase the cooldown of Wrath. If you can bring Hex then ignore this point as Hex will allow you to target Mischief safely.
  • Torment is one of the most dangerous Heads for this team as neither Shamael is here nor there is any Veil. My approach to Torment was to completely ignore him. Still, this resulted in my Fears and I just brute-forced through the Fear. This immediately dropped the success rate of Provoke on Decay, so Torment in combination with a Champion being eaten was very dangerous. I usually softened Torment down via HP Burn attacks/explosions and then jumped on him to finish him when his HP was low.
  • It is also important to choose if you should heal or revive. Both have their advantages and disadvantages. Healing lets the champion remain on the field, but, for example, a Godseeker revive would allow damage dealers to immediately use their powerful skill again. Still, that said using revives as an offensive tool is dangerous since the skill will go on cooldown and if something bad happens it won't be ready. It is a consideration to make which you get better with the more comfortable you are with your team.
  • Apart from eating Champions I did not care about Mischief at all in this team. This is because this team has no buffs at all. Only 1 actually from Nekmo (SPD). So most of the time Mischief attacked and stole nothing. Other times I had Block Buffs on him or if it was not on him (he is very fast and cleans it quickly) then on the other Heads which prevented him from sharing the buff. I think in the entire battle only 1-2 times their team managed to get the Speed buff, but it didn't really make a big difference in the battle as I kept Slow on them most of the time or killed them off.
  • Other teams handle Mischief by using a high RES bait champion. That is a very valid strategy also. Others use Hex to be able to just kill him off (as he is the weakest).
  • I almost never paid any attention to the Head of Suffering. Although few times he managed to get his Ally Protect through which did make freeing champions more difficult. Still, I think he is the lowest priority Head both because he is so slow giving you lots of time to take action and because he is so fat that he does not allow you to "farm" damage (+ his Decapitated Head is much harder to damage). He only becomes extremely dangerous further down the road when there is very little time to free champions. So you must watch his Turn Meter and try to count which Head will eat the champion. If you anticipate that he will eat and you will only have 1-2 turns to free the champion then this becomes a high risk situation. Also then watch when his Extra turn skill is coming.

Hope my RAID blog post was useful to you - best of luck with breaking your Hydra records.

Thursday, July 7, 2022

Hydra Nightmare 142M damage

Here sharing a post made by _Rust of achieving 142M damage on Hydra Nightmare (he says this team can do even 200M damage but takes too long to do it manually).

Here is the picture of his champions/team composition (unfortunately he did not provide stats):

And here is a picture guide that he shared:

(it's a large picture, click to enlarge to be able to read it)


Friday, May 27, 2022

44.74 mil damage 215+ Turns on Hydra Hard - my team & Tips:

Following the recent changes by Plarium to Hydra in RAID many players have been able to achieve some kind of an improvement versus their previous results.

What were the changes?

  • HP, ATK and DEF decreased on all Hydra difficulties.
  • The countdown of the Mark of the Hydra was increased from 16 to 20 turns.
  • Up to and not including Nightmare it requires less damage to free Champions after Digestion.
  • It is now possible to Provoke the Head of Decay.
  • Chest rewards were boosted.

My 44.74 mil damage on Hydra Hard

After multiple attempts which took about 2 hours (yes, unfortunately the RNGesus is very much still alive in Hydra) I was able to achieve my record of 44.74 million damage in a battle that took 71 minutes and 37 seconds. So a massive waste of over 2 hours just for 1 key.

Let's start with the screenshots and I will add some explanatory text after that:

Picture 1) Time taken

This picture, taken at the end of the battle, is there to confirm the correct time taken because the game does not show time over 1 hour (see picture 2), it wrongly shows only 11 minutes. The real duration is 71 minutes and 37 seconds for 1 key.

Picture 2) Result screen: 44.74M Damage Dealt

Picture 3) Clan View which also shows equipped sets:

Picture 4) Team stats

Information / Tips:

I tried different combinations before this team.

One of the combinations which was interesting was having Visix as the lead position. The advantage of this was having a permanent Slow on all Hydra Heads 100% of the time and having a guaranteed Provoke on Head of Decay. Her 3 turn Provoke cooldown was ready right before the Head of Decay had a turn.

Against all those advantages the disadvantage was less damage output as the lead position is a critical position. And furthermore, the risk when Visix was eaten the team lost both the Provoke and the Slow benefits.

Depending on what champions you have I would still suggest you to try this combination - it might give a good result for you.

In another combination I used Seeker to constantly attack Head of Decay. The benefits are the Provoke is on the A1 (not guaranteed but many attacks = high chance, however Affinity also can go against depending on Rotation) + TM boost. Unfortunately, for me this did not work out well because my Seeker is build for my Clan Boss team and he has a lower speed and is more focused on damage rather than being able to survive and provoke. But it is certainly an option for others.

Another good option for Provoke is Husk, however my equipment is not good enough to allow him both high accuracy and high CDMG using one of the 3 sets to help him CD faster (Reflex, Relentless, Frenzy). I tried doing this by boosting Accuracy with Kimi but this did not work reliably.

I also tried changing other champions not related to Provoke such as using Lydia, Uugo, Doompriest, Dhukk, Umbral and even Skullcrusher, but I did not get a good result.    

Another tip is that I noticed that since the stats are a bit weaker now it was easier to quickly kill 1 Head and start gaining big damage hitting the Decapitated Hydra Head.

Another tip is to keep discipline and keep hitting the Head of Torment instead of the Decapitated Head with all supporting champions and only using the damage dealers for non-Torment attacks. This results in higher damage output then if everyone would focus on the Decapitated Head.

Another tip is not to use ATK down debuff if you are playing with Geomancer as your main damage dealer. This increases risks especially with Head of Wrath but this is what you need to dish out bigger damage. Head of Wrath should be controller carefully by blocking buffs preventing his ATK up or removing his buffs with Geomancer. Also should be fully controlled when he does his big attack by counting the hits and manually triggering his big attack only after you are ready to receive it (either with a DEF up or with a Shield or Strengthen and after healing). It is important that you have a way to counter his Provoke by cleansing so that you can control the hits.

And of course the important tip with my result, as you perhaps already saw, is to use 1 or 2 Provoke sets (Taunting set) to help Provoke the Head of Decay. In this case you can see I have used the Provoke set on my Geomancer which worked well most of the time, however there were several occasions where he failed to Provoke up to 5 times in a row, so do not expect 100% success this way, but it was certainly enough to help me achieve my record.

I have given multiple other tips in my previous Hydra posts, please also refer to those such as: https://raid-tips.blogspot.com/2022/05/hydra-hard-33-mil-damage-150-turns-team.html

I hope you found this post interesting and useful. If you want other RAID players to benefit from my posts feel free to Like/Share my RAID Shadow Legends blog.

Tuesday, May 3, 2022

Hydra Hard 33 mil damage 150+ turns - Team Composition + Stats/Masteries Pictures + Explanations/Tips

In this RAID blog post I share with you my record to date on Hydra Hard reaching 33 million damage with over 150 turns battle.

Below you will find all the related screenshots and info from me. Content:

  1. Team composition
  2. Team & Damage pictures
  3. Champion stats & Equipment picture
  4. Applicable Hydra rotation / starting Heads 
  5. Role of Geomancer & Tips
  6. Role of Arbiter & Tips
  7. Role of Godseeker Aniri & Tips
  8. Role of Lady Kimi & Tips
  9. Role of Inquisitor Shamael & Tips
  10. Role of Mithrala Lifebane & Tips
  11. Masteries of all Champions

Team Composition:

The team I used was (below the pictures are full explanations):

  • Geomancer (team leader) - tanky lifesteal build
  • Arbiter - not dedicated to Hydra; Arena build, i.e. main focus to be fast to go first in Arena
  • Godseeker Aniri - not dedicated to Hydra; backup reviver / support built for beating Bommal
  • Lady Kimi - powerful speed control / sometimes (not often) blocks buffs
  • Inquisitor Shamael - not dedicated to Hydra; offensive build I use to snipe tough enemies in the Doom Tower
  • Mithrala - new champion for my account with zero books (waiting for CvC), unfinished masteries and not fully upgraded equipment.

Team & Damage Picture 1 of 2

Team & Damage Picture 2 of 2

Team Stats

Here you can see the summary of stats and equipment of each champion:

Hydra Rotation

The current rotation is (starting Hydra Heads):

  • Head of Decay (cleanses all debuffs on Hydra Heads)
  • Head of Torment (puts fear on you)
  • Head of Mischief (steals buffs)
  • Head of Wrath (massive damage dealer)

Role of Geomancer & Tips

He has several functions:

  • Main damage dealer. In this role he has to never die and keep putting HP Burn on all enemies except Torment. For this you need to build him as a tank and I found Lifesteal gear to be very effective in keeping him alive.
  • Team Protector: He protects the entire team every turn with his passive damage reduction. For this to be effective you need to put him in the correct position. I see sometimes players putting Geomancer in the middle of the team or at the end - this is wrong. He can only protect allies who come after him in the team position, therefore try to place him as the leader or at least in the 2nd position slot. This protection is significant, it is like having a 15% Strengthen buff at all times which cannot be removed.
  • Other:
    • Warmaster mastery is very important. It adds to his active damage as well as being critical in allowing Lifesteal gear to heal him fully.
    • Him important stats are SPD, HP, ACC. Players who have better equipment than mine can either boost his HP/DEF or boost RES - both of those will help him survive better.
    • I don't think SPD needs to be boosted too much as he is already supported by Shamael in this rotation.

Role of Arbiter & Tips

While the main role of the Arbiter is revive/boost she also has to do a couple of important things:

(my Arbiter is not built for Hydra; she would perform a lot better if she was. She is simply in my fastest SPD gear for Arena, which unfortunately is not fast enough)

  • Always attacking Torment no matter what is happening to keep boosting Team damage.
  • Cleanse buffs from enemies (my Arbiter is built for Arena with my best speed gear which is not that great so she does not have the required accuracy which is why mine fails to cleanse often, but it is still her role).
  • If the battle allows it exceptionally change from attacking Torment to try to place Weaken on decapitated Hydra Head(s).

Role of Godseeker Aniri & Tips

  • She is the backup reviver especially for when Arbiter gets eaten.
  • Tip: her revive should not be used most of the time. Let Arbiter do the job and keep it ready for emergencies.
  • Tip: Her revive also resets skills and this may be needed for Shamael to do his big attack, die and then revive and do big attack again.
  • Her heal supports but is not critical to the Team. 
  • Tip: she should also attack Torment in most cases to support Team Damage.

I think of her as a more "background" champion I don't pay much attention to but who supports the Team to do the job.

Role of Lady Kimi & Tips

Her role is to boost the Team while slowing down the enemy and sometimes put block buffs. She should be used smartly:

  • Tip: Don't just use all her skills as they become available. 
  • The AOE Slow is used most often but even this you should only use if the Hydra Heads debuff has expired or will expire in 1 turn. So sometimes you don't need to use this skill even if it becomes available and use it 1 or 2 turns later as needed.
  • The AOE Boost, on the other hand is much more tactical:
    • I almost never use it.
    • I observed that Mischief waits for you to use it before he steals buffs. It's like he knows about it (maybe they programmed AI like that).
    • When I don't use it Mischief steals buffs a lot less.
    • If Mischief steals only 1 buff then I will use it to boost the team and block buff on Mischief.
    • If Mischief steals more than 1 buff I will not use it. I will wait for him to spread it to his friends and then I will block buff on all. But this happens very rarely as I explained above.

Role of Inquisitor Shamael & Tips

Shamel has 1 or 2 roles depending on your choice.

Many Shamaels I know are built more tanky and with Toxic gear and therefore they have only 1 role. I did not like that so my Shamael is built as a damage dealer (sniper) with Giant Slayer instead of Warmaster.

My Shamael is not dedicated to Hydra; I built him actually for Doom Tower and I just use him in that build for Hydra as well.

  • His main role is to remove the Fear cast by Head of Torment and boosting the Team Leader. Although his skill says he should boost the whole Team there is a mistake in the game so he only boosts the Leader.
  • This boost supports the main damage dealer (Geomancer) to place more HP Burns.
  • His second role is being the secondary damage dealer and rescuing allies eaten by the Hydra.
  • His A1 can either go for damage or boosting. I usually use it for boosting (i.e. Torment).
  • His primary A2 target is Head of Decay. That is the worst Hydra Head in the game and is the one you want to kill first. However, if a champion is eaten then Shamael has to redirect to rescue operation.
  • When there is a decapitated Head then there is a difficult decision to be made. With 4 buffs my Shamael can do 200k x 3 = 600k damage to Hydra, but this takes damage away from killing other Hydra Heads. So depending on how the battle is going a different decision needs to be made. For example if Head of Wrath is in his "angry mode" it is probably best to attack him as during that time his counter will not rise. Or if Decay is near to death it is best to take it out and not let it cleanse all the debuffs, etc.

Role of Mithrala Lifebane & Tips

Many people have been getting Mithrala lately since everyone started doing Hydra at the same time and after collecting her fragments everyone is summoning her at similar time too.

Mine has no books at all. I will wait for the next CvC to use books (Wait Shadow Legends), so I think I could have performed even better than I did.

Mithralas roles, how I used her / tips:

  • Her main role is supporting the Team but this is then broken into 3 roles:
  • Role 1: With her A1 she copies Arbiter in only attacking Torment no matter if this is needed or not. We are trying to support Team Damage as much as possible.
  • Role 2: Cleanse and protect (her A3). Since she is unbooked I tried to keep this skill for emergencies only as I know it would take a long time until it is ready again. What I define as emergency in this case is (A) if the team is under full stacks of poison + either lower health or other debuffs too (B) when the team is low on health and Arbiter's heal has already been used and/or Wrath is about to hit hard.
  • Role 3: Hex and ATK/DEF buffs (her A2). This is broken down into 2 sub-roles:
  • (A) if there is no danger or if Mischief has eaten someone: then if I want to target / kill Head of Mischief I will use the Hex allowing everyone in the team to attack Mischief without the random redirection.
  • (B) if there is danger: by this I mostly mean Head of Wrath counter is coming to 15 for his big attack. In this case I will use this skill to get the DEF buff allowing me to take much less damage (remember I don't have any ATK down on this team).

So despite her having 5 turn cooldowns without books I did not always use her skills as soon as they were available.

Tip: You can also time Godseeker's buff extension with Mithrala's skills to get more use out of them.

Masteries

Also to share the masteries:

I hope you found this post interesting and useful. If you want other RAID players to benefit from my posts feel free to Like/Share my RAID Shadow Legends blog.

Saturday, February 19, 2022

Do’s and Don’ts by Plarium and for Plarium

In this blog post I share with you the Do’s and Don’ts communicated by Plarium and the Do’s and Don’ts I created for Plarium.

Do’s and Don’ts for Plarium

Do’s and Don’ts by Plarium

1

2

3

4

Wednesday, January 12, 2022

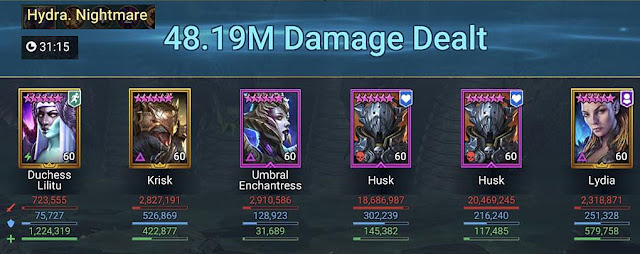
Boomer does Hydra Nightmare 1 key (39m DMG, 13 min) on Full Auto

In this short blog post I am sharing the video that Boomer posted where he does Hydra Clan Boss on Nightmare difficulty 100% on Auto with 1 key.

That's pretty impressive and, of course, most people will not have his champions and his gear but it is already interesting to see that it has been accomplished.

From here on, RAID players will try to improve and expand so more people can achieve that.

Champions he used:

The stats are insane - 99.9% of players don't have this. But it is on Nightmare difficulty so players on Normal/Hard can, of course, have much lower stats.

  • Dutchess with 90k HP, 3.8k DEF, 293 SPD, 497 RES, 238 ACC
  • Krisk with 64.5k HP, 3.6k DEF, 277 SPD, 502 RES, 423 ACC
  • Tuhanarak with 53k HP, 4k DEF, 268 SPD, 476 RES, 415 ACC
  • Venus with 50k HP, 2.9k DEF, 247 SPD, 458 RES, 410 ACC
  • And 2 damage dealers:
  • Ninja with 40.7k HP, 1.8k DEF, 267 SPD, 173 RES, 448 ACC, 229 CDMG
  • Royal Guard with 49k HP, 1.8k DEF, 246 SPD, 140 RES, 177 ACC, 245 CDMG

Boomer's Video:

Title: "FULL AUTO 11 MIN 1 KEY NIGHTMARE HYDRA SHOWCASE"

Video:


Saturday, January 8, 2022

14.71m damage on Hydra Hard with WEAK STATS: SPD from 157, HP from 33k, 2x 5* champs, DEF from 1945

In this blog post I share my success of 14.71m damage on Hard Hydra Clan Boss with a team with very weak/mediocre stats. Update: I also added stats, masteries and lots of explanation.

  • Speeds from as low as 157 
  • HP from as low as 33k
  • 2 champions at level 50
  • DEF from as low as 1945
  • Few masteries on Kimi 
  • Some on Umbral
  • Arbiter in Arena set (Defense/Support), i.e. no Warmaster.
  • Umbral's Block Buffs totally unbooked, so she failed a lot (I will consider to book her during next CvC, she just takes too many books so I have to think) - I might have performed better if she didn't fail. Picture at the bottom.

Picture 1 of 3 - the battle result:

This team composition strategy focuses the entire team to do nothing else than support Geomancer. As you can see from the picture Geomancer and Shamael did all of the damage.

Picture 2 of 3 - the stats:

  • Geomancer is my Clan Boss champion (tuned team) - not changed for Hydra
  • Aox was my old Clan Boss champion (untuned team) - not changed for Hydra
  • Arbiter is my Arena lead - not changed for Hydra
  • Umbral has been a secondary champ, used in niche cases where I needed Provoke. Not planning to 6 star her yet - lower priority. But I will maybe book her during the next CvC because she keeps failing Block Buffs when unbooked.
  • Kimi I did not invest in because there is no Shadowkin Faction War yet (so I invest in other factions), but I will definitely 6 star her among the next ones.
  • Shamael is my Doom Tower sniper - not changed for Hydra.

Update: Picture 3 of 3 - Masteries:

Here also picture of the masteries for reference - there is room for improvement.

Reference: Umbral skills:

Update: some battle concepts:

The first priority was to take out the Head of Blight as I didn't have anything to deal with all its poisons. I only had mediocre healing from Aox and the near-dead healing from Arbiter.

All supporting champions tried to attack Head of Torment to give boosts to Geomancer or Arbiter when Geo was dead. For this it is important you put Arbiter in the 2nd position so she becomes the leader during all those times when Geo is killed.

If it is possible to let your champion with Mark of the Hydra die - do that. That's much easier than trying to recover them. That means having some difficult moments of not healing and letting Hydra kill it off. It is not always possible, but sometimes it certainly is.

Try not to kill Head of Torment. Any stronger attacks should be directed elsewhere such as the A2 of Shamael. He will still die, I had 2-3 Torments during my battle including 2 rotations without Torment.

When Head of Decay comes focus all efforts to kill it. That's the most dangerous Head of Hydra. However, make sure at all times that another Head has lower HP otherwise Decay will shield himself and we don't want that.

When Head of Suffering appeared I was happy. Even though he reduces damage and can be annoying he is not dangerous and he is slow. Completely ignore Head of Suffering as a low threat.

Head of Wrath must be watched carefully. He has the potential to wipe the entire team. For this reason you should have 1-2 very tanky champions allowing you to replay the battle if needed. In my case Aox and to a lesser degree the Arbiter were my tough cookies. Multiple times it happened that everyone died except those 2 and Arbiter brought everyone back followed by Aox's healing above the 50% after Arbiter's healing.

Head of Mischief is almost in the same category as Head of Suffering but he is more dangerous because he is much faster and if he eats one of your champions it's hard to target him. So after putting HP Burn on Head of Blight then I targeted Head of Mischief.

I did not use Arbiter's boost/heal as soon as she has it. I had to make a decision if my team will die then I should keep it to use it after Revive. Otherwise I only used it when the team was in acceptable health and Head of Wrath was not near 15 counter.

Most of the time I did not use Speedup of Kimi and used only the slow. This is because often Block Buffs failed on Mischief (as I mentioned my Umbral is not booked in that). I only actively started using Speedup after Head of Mischief was dead and I was fighting different configurations of other Heads.

I also did not use Aox's heal immediately. I wanted to make sure it comes after Arbiter's heal and also after debuffs are placed for maximum effectiveness (his heal depends on the number of debuffs).

Umbral did absolutely nothing other than trying to put Block Buffs and doing A1 on Head of Torment or whatever Head when Torment was missing. My Umbral does no damage at all so I don't care what she attacks.

- - -

This turned out to be a pretty long blog post (please like/share if you liked it), so I hope it helps other RAID Shadow Legends players who are struggling with the Hydra.

Multiple Successful Hydra Team Compositions GravPi & Fujitora-Sama & Nub Raids

In this blog post I share with you various team compositions different RAID players used to beat Hydra Clan Boss with success in Rotation 2.

Team by Fujitora-Sama: Difficulty: Hydra Hard

Additional information provided:

This team works on auto as far the Head of Decay stays behind the scene. Head of Decay is the most annoying head.

This team speed goes from 268 to 206. Lydia and Pyslar are the fastest because they have to speed up your team and speed down the heads. By doing this, your team will have enough speed to over lap the heads to keep the debuffs uptime for the hole fight.

Block buff and attack down are the most important buffs here.

Gurptuk has his a2 locked so he can place continuous heals very often. ( He did 2 mil. heal )

Shamael is a must in this team. Gurputk can't be swapped if you don't want to use a reviver. You don't need the rest of the champions.Mashalled can be replaced by Yannica and Ursuga can be swapped by any attack down champion.

Kaiden has attack down and can revive up to two allies. Iron brago has def up, attack down and can boost your team def.

I have made another team without Shamael using Doompriest.

Team by GravPi: Difficulty: Hydra Nightmare

Husks are both in relentless with about 250 speed, 220% cdam, 50k HP. If you have refresh accessories (I only had one between them), those will be good as well.

The build is not that special, relentless with about 250 speed and 225% Crit Damage is what you want.
Teams by Nub Raids: Difficulty: Hydra Hard + Normal

Nub Raids made 2 videos showcasing 2 successful teams:

1) Geomancer DESTROYS Hydra rotation 2 -- Hydra HARD

2) Hydra rotation 2, easy EPICS ONLY 1 KEY team -- Hydra Normal


Wednesday, January 5, 2022

Hydra Season 2 Rotation Pros & Cons

In this short blog post I share the Pros & Cons of Hydra Heads Season 2 Rotation in RAID.

The Heads of Decay and Suffering are taken out of the front line-up and Heads of Blight and Wrath added. This creates a number of advantages and disadvantages:

  • We will have multiple poisons, poison explosion, poison cloud and leech from the Head of Blight. All of this makes it harder to survive.
  • HOWEVER, we will no longer have the cleanses from the Head of Decay which means we can load as many debuffs on all the Hydra Heads as we want. Especially AOE Attack down and Defense down (+ Weaken + Slow if possible) and filling up the rest with other debuffs such as HP Burn and Poisons.
  • Then the Head of Wrath will bring very powerful attacks which have the potential to wipe out the whole team not letting players to replay.
  • HOWEVER, we will no longer have all the Head protections from the Head of Suffering, which means they will have 50 less resistance and will take 20% more AOE damage!

Note: we have to put all the debuffs BEFORE the Poison Cloud because it forces Weak Hits which do not allow debuffs (unless it is a "Place" type debuff).

If you liked this RAID blog post kindly like/share with other RAID players.

Tuesday, December 28, 2021

Ninja + Shamael = 16M-36M damage @ Hydra HARD + NORMAL

If you are struggling to 1 key Normal or Hard Hydra in RAID and you have Ninja and Shamael then this post is for you. Below you will find examples of 15m (Hard Hydra) and 35m (Normal Hydra).

Ninja is an awesome damage dealer anywhere in RAID and he also does very well in Hydra battles. His main damage comes from the Hailburn skill while his A1 can also hit hard around 100k or more. Furthermore, as the booster leader, he accumulates his Passive bonus much faster increasing his damage further.

What you have to do is put him as the Team Leader despite the fact that he has no Leader bonuses. Doing this, with Shamael in the team, will constantly boost Ninja's turn meter allowing him to do his attacks much faster.

Naturally the rest of the team can support by attacking the Head of Torment and supplying the supportive  buffs and debuffs for maximum effectiveness.

The rest of the team is a FREE CHOICE depending on what champions you have. The only required or strongly recommended champions here are Ninja and Shamael.

Try to bring a champion who can cast AOE Slow, AOE ATK down + DEF down and Weaken if possible. You will also need one Reviver in case the weaker attackers die and need to be picked up. Your Arena Arbiter can do that job as well as supply ATK up and buff removal.

Important note: due to the Hydra battle RNG we have to restart if the Head of Torment does not respawn.

Example with my team (lots to improve) on HARD Hydra 15.76M damage:

Picture 1 - battle result:

Picture 2 - in-battle last turns:

Update: this week I managed to get similar result with Demytha

This week was unlucky, I had to play multiple times to get the Head of Torment to spawn again. I always got Blight or Wrath making me re-start constantly.

I also tried different combinations and finally finished with this one with Demytha, basically swapping Aox with her. I lost the benefits of Aox but got healing, cleanse and block damage. Still not ideal, I will keep searching / experimenting.

Also an interesting point about positions: I moved Arbiter to the 2nd position so when Ninja died she would be boosted letting me RES much easier.

Example of Soda's stronger team on NORMAL Hydra 35.96M damage:

Soda's video: